My first Faulenzer
November the 2nd 2010
Some years ago I made "Twiddle" chain parts only using a ruler, 2 knitting needles and a cutter, - and hammer and anvil. But the instructions I got use a "Faulenzer". Because my tutorial should be exact I was looking for a fitting piece of wooden strip, sand paper, nails size 2,2-2,5 mm diameter, a saw with a blade for metal and a fine file. All this I needed to get 2 deburred nails without heads into a piece of wood without splinters, the Faulenzer. Most of the things I got out of the tool shed I have inherit from my father, nothing a jeweller would use. The tools are in the shed since 1954.
A wooden strip about 6 inches long, - 200 x 35 x 15 mm - is enough for this faulenzer. I did not cut the strip because I will put some more nails for other sizes and patterns into it.
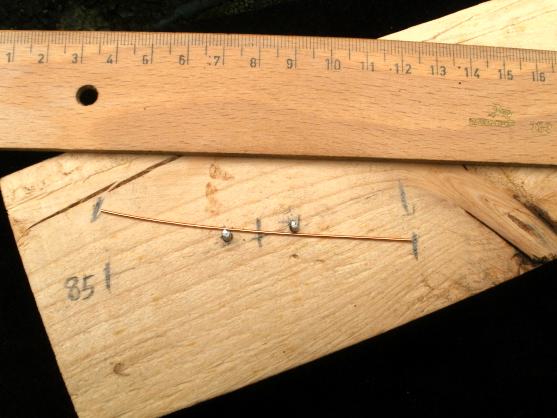
Usually I bend the wire into the opposite direction. Therefore is the other pair of lines (with the 85). Because the german description bends into the other direction I didn't change the tutorial and drew only two more lines.
Today the sun was shining a little bit, just enough to make some photos without flashlight. So I could finish the "Twiddle" Tutorial.
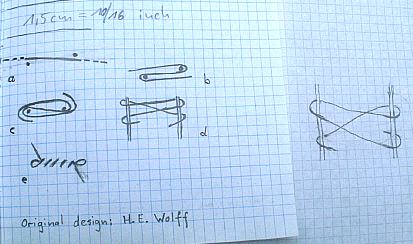
I have drawn the draft from the original description. It shows, how to use the faulenzer.
If I follow Mr. Wolff's text and not his draft, the wire (at c and d) is like in my extra draft at the right. If Mr. Wolff is right, he didn't describe it the way it looks like.
If I follow my draft and the text of Mr. Wolff the result looks like draft e, where the ends are showing in opposite directions.
So I guess, I am right. What did you find out?